Saturday, November 9, 2013

Summer Garden 2013

This is what kept me busy all summer long on my 30X70 foot main garden and 20X30 strawberry patch.


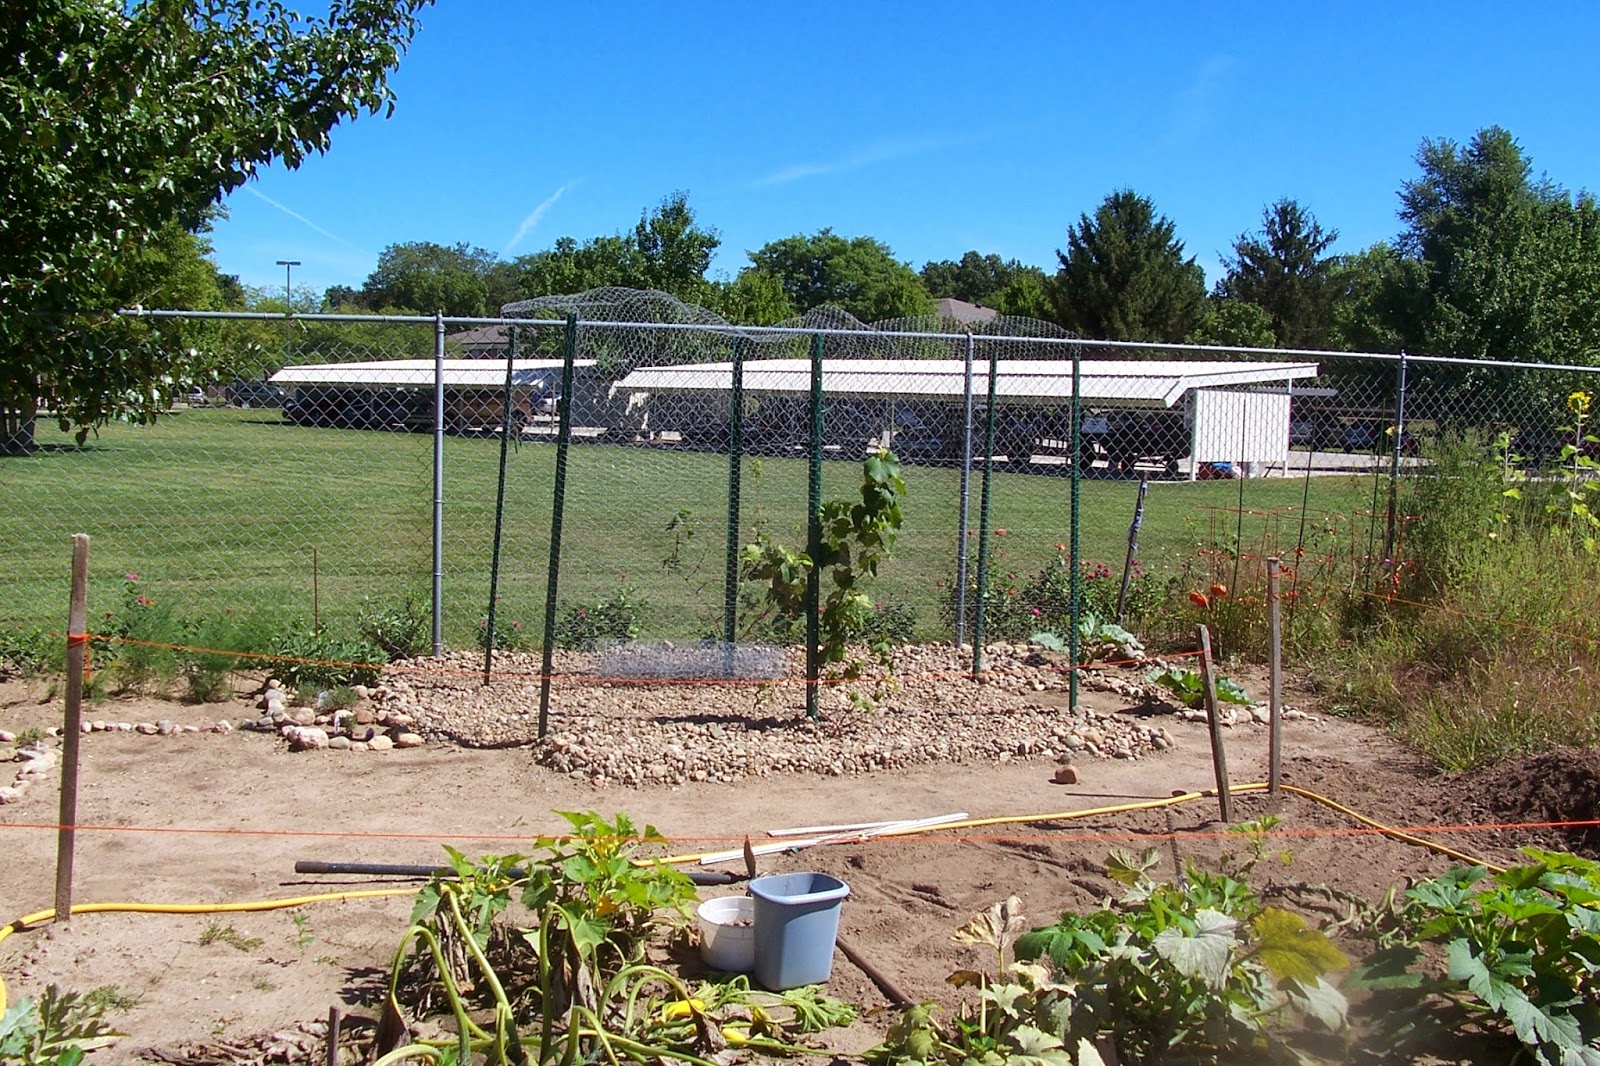
Notice the hawk in the sky. My spot is in the center of this picture where all the stakes are.


Left side of garden. Front row across green sweet pepper plants. One plant started out with over 20 peppers in the spring and then before frost it still had over 25 new peppers growing.  It was a very good year for peppers. Next going back row of onions, row of garlic, row of dill.  My onions did OK but not that good but the garlic did not produce at all so will not grow them again.  But had a super crop of dill. Next set of rows starting on the left regular peas, basil, snap peas, behind them more regular peas, radishes, and another row of radishes.  Back row zucchini and zinnia flowers.  In the far back along the fence is my herb garden. On the right of this picture is cherry tomatoes, regular tomatoes, cucumbers, summer squash and in the far back my grape arbor and rhubarb.

.
Regular Peas, Basil, and Snap Peas, Zucchini top right


These were the best tomatoes even though I got them by mistake.  They were labeled grape cherry tomatoes but this is what they grew to be.  Later I found a tag-Champagne Tomatoes. They were the most perfect tomato with no blemishes.  I will be trying these next year for sure good quantity also just wish I did not have to put up with the black spot fungus this year.  That was something else hope it does not come back next year.


Zucchini/Summer plant new hybrid. It was funny half of the plant the squash grew like this and on the other side it grew just as summer squash.  But I think it all tasted like summer squash.  It was good and hardy until the bugs killed the plants.  Try dish soap and water to keep the bugs away in a spray bottle and spray on the leaves and stems early and keep it up.  I started in the beginning then lacked off then got hit with the bugs and they killed my plants.


Wind chime and stepping stone my garden friend Jan got for me. Sweet 100 cherry tomatoes in background the best ever cherry tomatoes will never buy anything else, ever so so sweet and good.


Stepping Stone


 My $70 grape arbor and yes I did it all myself.  Well I did have some help pounding in the stakes. As you can see I did not get them very straight.  I used chicken wire for the sided and top so hopefully I will have a nice arbor before long.  Housing would not let us use their fence so I had to build my own arbor.  That is their fence along the back.  It runs the entire outside of the garden and us who garden have keys to get in.  I have red seedless grapes in the back and the label said just red for the front ones. Behind the arbor at top of picture are my rhubarb plants.  In front left of picture where stones are is part of my herb garden.  Oh yea all the stones you see here are stones I collected while I was hoeing this summer can't beat free landscaping.


Front view of arbor. Summer Squash/Zucchini bottom of picture.


Rhubarb


Metal Humming Bird Garden Ordainment got at Ladies Night Out made with silverware, nuts and bolts, nail and washer. Totally Awesome


One of my three rose bushes.  If you enlarge the picture you can see the black spots on the leaves.  That is the fungus that hit the garden big time this year.  It hit the tomatoes, strawberries and roses.  I treated the tomatoes but just took the infected leaves off the strawberries and and roses.  We are hoping it does not come back next year. It cost me $8 a bottle for five different treatments. so was kind of costly this year.


Oregano and chives


 Oregano and chives close up view


Herb garden. Back left of tree oregano and chives. Right of tree asparagus, along fence top of row of rocks sage, going down row English Thyme and up front Rosemary.  Left row of rocks I started a new patch of chives. This was a new kind called garlic/onion. since it was new I did not pick any but tasted a few and it was delicious cannot wait till next year. In the middle of rocks on left lemon balm and on right lemon thyme.  I like my spices!


New flower bed. Not sure what flowers called but think maybe corn flowers.


Some of 70 foot of flower bed outside fence. Marigolds and zinnias planted with seeds saved from last year.


Flower bed outside fence.Rose bush, Lilies, Lilies of the Valley, Peony Bush, and Sweet William.


New flower bed by gate mini glads inside garden .  Marigolds on outside fence from seed from last year.


Another new flower bed along inside garden this is some kind of ground cover with a little purple flower. Top right corner rose bush plus later planted some hens and chicks. 


Lastly my strawberry patch.  I started this last year with 600 plants.  I got about 20-30 strawberries or so every few days during June this year.  A little trouble with black spot toward the end of the season but think I did pretty good for the first year.  It was so nice to go out every morning and start the day off with some fresh fruit every day before I got started.  Along the fence between the two center rows I planted my blackberry plants.  They did not produce this year but hopefully next year.  The open plowed area is where I enlarged my area this fall to get it ready for next spring to plant some raspberries.


Raspberry spot on other side of strawberries.  Mint growing around tree.


Baby Robins in the tree by my herb garden

So that was my summer.  What do you think? Give me some feedback and let me know what you think of it.


Tuesday, October 22, 2013

Quilt: The Fuzzy Duckling

I have been busy working on this quilt since the beginning of this year.  Our library in Ionia was asking for quilters to donate quilts using blocks telling the story of "The Fuzzy Duckling". The pages from the book were transferred to cloth and this is what we started with.  Then we were left to our own imagination as to how we wanted to design the quilt.  Here is a picture of the finished quilt.


Of course Henry just had to get in the picture also! 

It fits the top of my queen size bed with just a little overhang on three sides.  They had over 50 quilts donated and next spring they are going to raffle them off to support their children's reading program.  They give a free book to a child every month and the money from the quilts supports this.  I created the quilt squares and then machine sewed them together.  I added embroidery stitches and hand quilted the layers together.


This is before I quilted and put it together.


This is the first page of the book.  All the pages in the book are bordered in bright yellow.


This square shows three of the different embroidery stitches I used.


This square was used throughout the quilt using a portion of the Dresden Plate template.  I think it reminds me of the tail feathers on the duck.  I also embroidered the edges using the blanket stitch.


Another square showing more embroidery.


Center row using embroidery chain stitch


Row around edges


Overhang at the foot of the bed

So I hope you forgive me for not posting for the year but have been very busy with this.  Next time I will show you pictures of my garden that I planted this summer.  That is a second reason why I have been so busy.  So add some comments and let me know what you think.  It was very very hard to give this up once I got this done especially since I just had a new granddaughter born on 100613.  Emma Rachel Turek, more about her later also.


Wednesday, February 20, 2013

New Projects

Have been busy trying some new projects.  First I will tell you about something that happened this Christmas.  While at my daughters Stephanie's house for Christmas I was using my granddaughter Mariah's favorite cup that she got as a present a while back.  We both collect black and white cow stuff and it was a black and white cow drinking cup.  Long story short I was drinking out of it on Christmas and it got broken.  I felt so bad but I told her to let me take it home and I had this wonderfull stuff (crystal effects) that could fix it.  It had only broken into four large pieces.  No problem right.  So I took it home fixed it and sat it on my table overnight to dry.  Next morning I get up and here it lays on the floor in a million pieces.  Henry my cat decided it looked better there!  So after a few minutes of panice I start over.  I tell you crystal effects can fix ANYTHING.  There is no waist with this stamper!!!  So after getting it together I think well she certainly cannot drink out of this anymore so I will make a flower arrangement out of it.  So here is my finished project.


Cow Flower Arrangement with cow lollies 2013

The center of the large lollies (rosettes) and the small daisy flowers are cow print material cut out of the scallop and five petal dies.  If you enlarge the picture you might be able to see that some of the branches of flowers are black beads.  These were silver but I painted them with black acylic paint.   I folded the leaves over the edge of the cup and hot glued them to the side to cover most of the large cracks so you could not see them.  From a distance you could hardly tell it was broken.


Granddaughter Mariah Elizabeth Smith 2013

Here is Mariah when I gave it to here.  She thought it was really cool.

Now on to the project that I have been working on for the last few weeks.  My upline Ronda Wade started a nonprofit group using stampin up cards and prayer request .  She has a blog that you can go to and request prayers or join and pray and send cards. It is called Project Hope ( Project H.O.P.E. helping other people experience God's love).


http://events.r20.constantcontact.com/register/event?oeidk=a07e70boghree29a076&llr=rpi5p8dab

or   stampwithronda@gmail.com;

If anyone is interested just give her a jingle and she would be glad to give you the infor.

I decided to make a binder for all the prayer request that I have received so far so that I can go to at a glance when I want to pray for them.  Here is some pictures of the binder.

Project Hope Binder Outside 2013

PAPER:  Core Dimentions Cherry Cobbler, Old Olive CS, Regal Rose CS, Blushing Bride CS

INK:  Basic Black, Old Olive, Rose Royal, Distressing Essentials Tea Stain Ink, Veras Mark

STAMPS:   Garden Silhouettes, Bliss, Thinking of Father, Live Your Dream, Office Ephemeria, Define Your Life, Defining Alphabet, The Open Sea, Small Alpha set non SU

PUNCHES:    Large border Lace Ribbon, Framelits Apothecary Accents, Framelets Labels Collection, hand held large 3 hole binder hole punch

ACCESSORIES;   Big shot, sticky strip, tom bow glue, glitter, heat and stick powder, sanding block, dimentionals, med size binder, sponge

Inside binder has pockets on both sides

I had extra paper that I cut to size to fit to write my requests on. 

Did you know that each of the different cancers have a different color ribbon for them.  Here is a web site that I found where you can get the different colors from. 


Two of the cards for cancer that I have done so far:


Breast Cancer Pink Ribbon 041612
Outside of card on left inside of card on right

PAPER:  Whisper White CS, Melon Mambo CS, Pretty In Pink CS, Attic Boutique DSP

INK:  Basic Black, Melon Mambo

STAMPS:   Gods Way, Cancer Ribbon, Special Blessings for Blocks

PUNCHES & DIES:  Punch Blossoms, Borders Scallop Trim

ACCESSORIES:  Brads, Pretty in Pink 1/4" grosgrain ribbon, heart corner punch, sponge, snail


021913 All Cancer Card Lavender Ribbon
Outside of card on left inside of card on right

PAPER:  Whisper White, Concord Crush and Lavender Lace CS

INK:  Basic Black, Lavender Lace Ink and Concord Crush marker

STAMPS:  Bloomin Marvelous, Words of Wisdom, Kindness Matters and Ribbon of Hope

PUNCHER & DIES:  Framelits Window Frames, Edgelits Finishing Touches, Textured Impressions Embossing Folders Delicate Designs.

ACCESSORIES:   Festive Paper Piercing Pack, push pad, paper piercing needle, rhinestone ice square brads, lavender ribbon, tom bow glue, big shot, bone folder, cutting pad, multipurpose platform.

On the edge of the card I used the Edgelits Finishing Touches to make the lace edge for the back page of the card.  On the front page I reversed the edgelit to make the scalloped edge as you can see on the bottom left hand picture.  Now when you do this it cuts away the paper from the card and on the edgelit you are left with the cut away lace paper.  Do not throw this away.  I did not use it on this card but will save it for a future card.  But it would make a great lace ribbon effect.  See picrure below of cut away part.


This is it for this time leave a comment and let me know what you think of my new stuff.  Have a great day.

Wednesday, January 30, 2013

I Am Finally Back


Where did the last 11 months go too? Sorry about not posting but I have been busy and have lots of pictures to share with you.  I was busy all last summer planting a garden.  This was the first time for me and boy it sure does take up a lot of your time.Here in our apartment building management has a fenced in area that they plow out for us to use for garden space.  I had two spaces one space 45 by 75 feet and the other 45 by 15 feet or something like that.


This is the wrong picture but the plot next to mine. I am on the left of the screen.  Where you see the pole on the left is the right side of my plot starts and goes all the way back to the fence.  From the left side I have two rows of green beans, then next to that are two rows of yellow beans.  In between are some mixed flowers to keep the bugs away. Next  to the right are a variety of pepper plants.  As you follow the beans back down to the end of the rows going the opposite direction across the back of the plot are four rows of sunflowers.  Then behind them are some flowers, herbs, wild asparagus; chives, and oregano along the fence.


Now this is my garden. Continueing right into the garden starting with the pepper plants on the front left corner.  (This picture was taken a little later because you can see that the beans are up now top left corner.)  Going to the back at the end of the peppers are some acorn squash,  where the wood slats are (used for shade) we planted leaf lettuces, spinach, and radishes.  Behind them are butternut squash, then the sunflowers going the opposite direction. To the right of the hose is more acorn squash then going back are our 48 tomato plants, 12 cherry tomato and the rest Roma's tomatoes.  Behind them is a patch of cantaloupe.  I ended up getting over a thousand ripe Roma's tomatoes to can.  We had 7 picking on our beans and I finally stopped because I could not find anyone else to give them to.  I canned over 15 dozen quarts and pints of different things from my garden and loved every minute of it. 


Veggie Man keeping guard over the garden


This is where our second plot.  It is next to my friend Gwen (on the far right) and the smaller of the two plots.  Where you see the chair we had a row of wild daisies but they never came up.  In the right front where you see the wet spot are our cucumber plants. We planted them late and only had three hills. Going to the left are a row of Zinnia's, then Basil on half the row and Cilantro on the other half.  Last row onions and next to that mixed leaf lettus and a patch of wild flowers behind them.

Wild flower patch


Watermelons.  We had over 35 watermelons

                                                                
You can see things are producing rather nicely.  To the left are the rows of beans in bloom, center front are five different variety of pepper plants, behind them you can see the squash in bloom.  On the right are the tomato plants.  We put mirical grow on the plants and the tomatoes got so large that we had to strip the leaves off so the sun could ripen the fruit.  The plants grew over six feet tall.  Here the hose is giving them a good sprinkle.


In front view of the peppers on left and acorn squash on right, tomatoes behind.


Believe it or not this is my bean rows BEFORE I weeded them.  They got a little ahead of me.  My partner in the garden was suppose to do the weeding and I was suppose to do the planting but I intended up doing all of it, or I might not of planted so much.  But Everyone said I had the best garden of everyone.


This is me setting in the chair weeding the garden.  Do these beans look better?  Everyone teased me about my floppy hat but it did the trick.  After wearing shorts one day and burning my legs and ankles I did not wear them any more.


This was our prize sunflower it was over 14 feet tall.  That is my friend Sharon who was suppose to be doing the garden with me.

                        
This is the stalk from that sunflower it was over 12 inches around.


This is the spot where the watermelon were at.  I transplanted over 600 strawberry plants in the fall to start a new patch for next year.  Well there this is what I did this summer.  What do you think?